What Is a Bezel Setting?
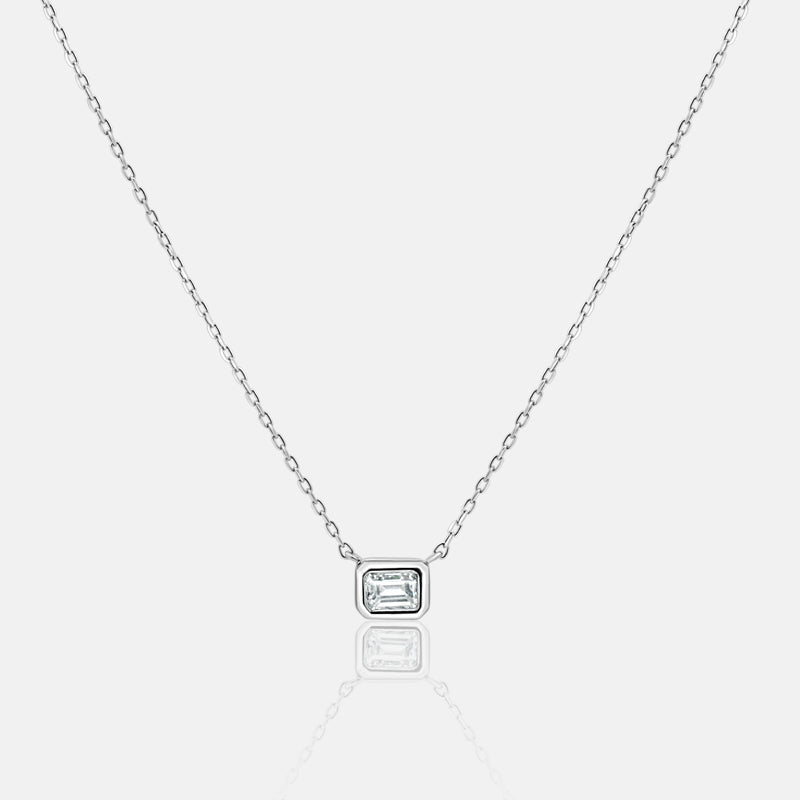
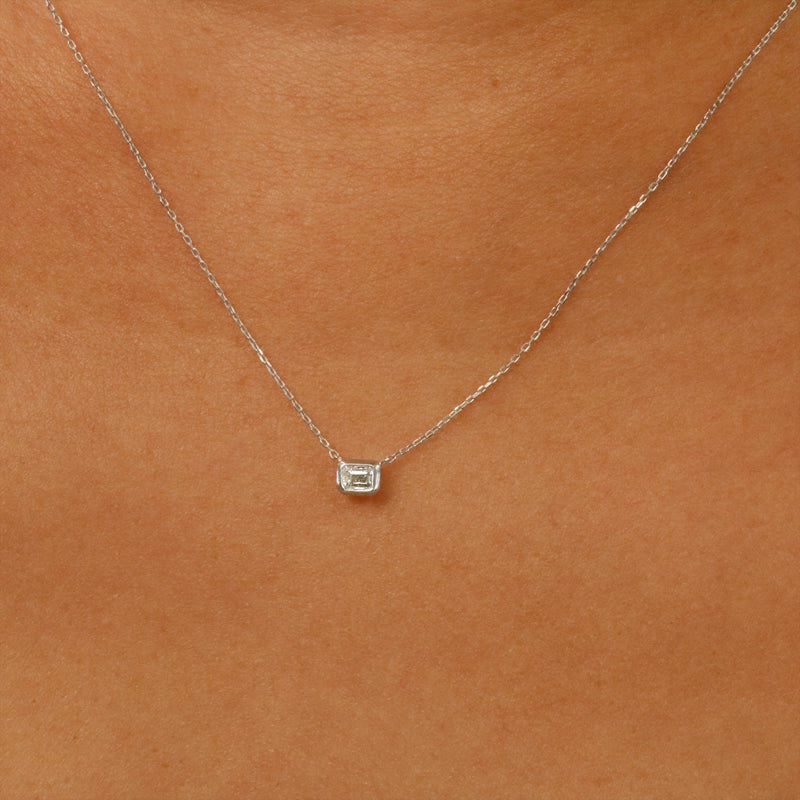
A bezel setting holds a gemstone inside a metal rim that wraps around its edge. Also called a rub-over setting, it helps shield the stone from everyday knocks and has no prongs to catch on clothing. It is a strong choice for a ring you plan to wear every day, though the metal rim can cover more of the stone than prongs do.
At Masina Diamonds, we have spent over 40 years helping Atlanta customers choose and create diamond engagement rings. We bring that custom jewelry experience to this guide to help you decide whether a bezel setting fits your stone, style, and daily life.
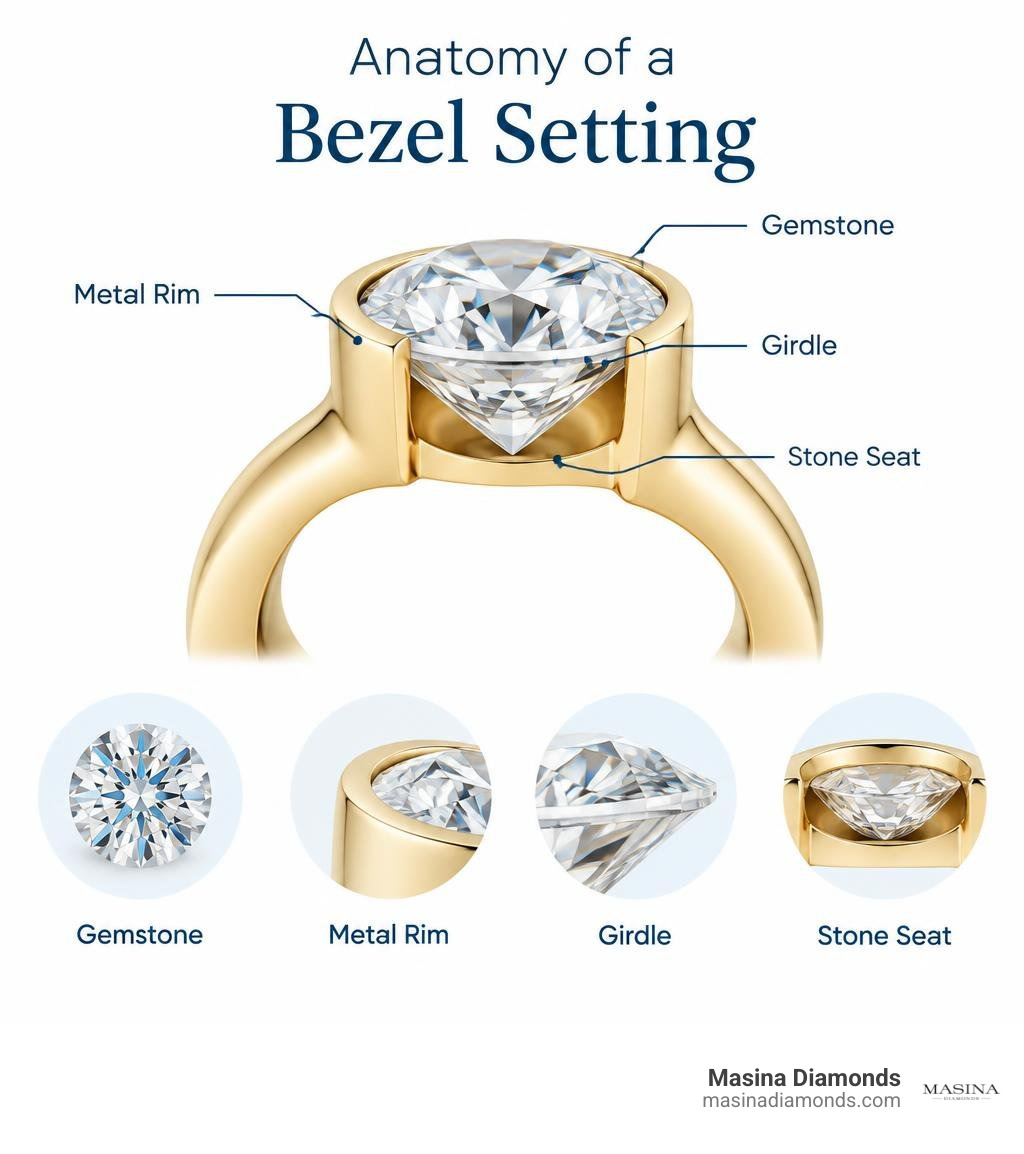
Dating back to the earliest days of metalsmithing in the early 1600s, wrapping a continuous band of precious metal around a mineral was the very first method artisans used to secure gems into wearable ornaments. Today, that ancient engineering remains the gold standard for long-term stone protection, celebrated for its modern, architectural aesthetic and unmatched durability.
Understanding the Bezel Setting and How It Compares
At its core, a bezel consists of an elevated collar of metal that encircles the widest perimeter (the girdle) of a gemstone. A bench jeweler forms this collar, fits the stone inside onto a carved interior ledge called a seat, and carefully rolls or presses the top lip of the metal over the stone's crown facets or dome.
Bezelling generally takes two stylistic forms:
- Full Bezel: The metal completely wraps 360 degrees around the perimeter of the stone, providing maximum shielding against accidental impacts and everyday wear.
- Partial (or Half) Bezel: The metal rim grips only designated sections of the stone—such as the top and bottom or east and west sides—leaving portions of the gemstone's profile exposed to invite extra lateral light.
| Feature | Bezel Setting | Prong Setting | Flush (Gypsy) Setting |
|---|---|---|---|
| Stone Security | Maximum (fully shields stone edges) | Moderate to High (vulnerable to bent claws) | High (embedded in surrounding metal) |
| Profile Height | Low to medium, flush against skin | Elevated, sits proud off the band | Completely flush with the metal surface |
| Snag Potential | None (smooth, continuous rim) | Moderate to high (prongs catch on fabrics) | None |
| Light Entry | Top and pavilion reflection | Enters through top and all sides | Enters only through the top table |
| Labor Precision | Extremely high custom tolerance | Standard bench assembly | High drilling and burnishing tolerance |
Bezel vs. Prong and Flush Settings
While prong settings elevate a gem using tiny claws to maximize light entry from every direction, those claws can snag on sweaters, loosen over time, or bend under pressure. Exploring why bezel set wedding rings are stealing the show reveals how eliminating fragile prongs transforms everyday wearability.
In contrast, flush settings embed the gem directly into a hole drilled into the thick body of the band, with metal burnished over the girdle. While flush settings are exceptionally smooth, they are generally limited to smaller accent stones because embedding a large center diamond requires a massive, heavy band. The bezel setting achieves the perfect balance: it supports large, prominent center stones while offering the snag-free, low-profile durability of enclosed metalwork. For bench artisans comparing structural techniques, studying a basic prong stone setting tutorial illustrates just how different claw alignment is from compressing a continuous bezel collar.
Advantages and Disadvantages of a Bezel Setting
Choosing a mounting comes down to balancing protection, lifestyle, and visual preferences.
Advantages:
- Superior Stone Protection: By covering the entire girdle, bezels protect fragile edges from chipping.
- Zero Snagging: Smooth edges glide across knitwear, gloves, and activewear without catching.
- Visual Size Enhancement: The surrounding rim of white gold, yellow gold, or platinum creates a framing halo that makes the stone appear larger.
- Modern Minimalist Style: Clean lines provide a sleek, contemporary profile favored in modern bezel engagement rings.
Disadvantages:
- Slightly Less Lateral Light: Because metal encases the sides, light enters primarily through the top table and crown facets rather than the pavilion sides.
- Intensive Labor and Skill: Bezels require tighter tolerances than prong mountings. A master setter must fabricate or cut the metal to within fractions of a millimeter to prevent the stone from rattling.
Choosing the Right Gemstones and Metals for Bezel Mounts
Not every cut or mineral behaves the same under compressive metal forces. Choosing the right gem geometry ensures a lifetime of structural integrity.

A gemstone requires an ideal side bevel angle between 55 and 75 degrees along its crown or dome. If the slope of the stone is completely vertical (90 degrees), the metal collar has no angle to push against and cannot physically lock the stone down. Conversely, if the angle is shallower than 45 degrees, the metal will slip right off the crown.
Best Gemstone Shapes and Cuts for a Bezel Setting
- Cabochons: Smooth, domed minerals (like turquoise, jade, and star sapphires) are the historical companions of bezel mountings. The natural curve of a cabochon provides a continuous slope for burnishing.
- Round Brilliant Diamonds: The standard 57-facet geometry allows a uniform bezel rim to fold down evenly around the entire circumference.
- Emerald and Step Cuts: The clipped corners of emerald cuts make them natural candidates for bezels. Our modern bezel set emerald cut diamond ring encases fragile corners inside sturdy metal walls, eliminating the chipping risks common with prong mounts.
- Oval and Fancy Shapes: Flowing contours look exquisite in multi-stone layouts like a bezel set oval diamond band.
- Freeform and Soft Stones: Gems with lower Mohs hardness ratings (such as opals, moonstones, or tanzanites) benefit tremendously from full bezels, which shield soft crystalline edges from accidental surface impacts.
Selecting Metal Gauge and Alloy Durability
Choosing the correct metal gauge is critical:
- Gauge Thickness: We recommend 24-gauge (approx. 0.51 mm) to 26-gauge (approx. 0.40 mm) metal for most center stones. Pre-fabricated strips sold at 28 to 30 gauge are often too thin; they can wrinkle like aluminum foil or tear along the solder seam when pushed.
- Platinum: The gold standard for fine bezels. Platinum is dense, malleable, and does not exhibit "spring-back," meaning when it is pushed against a stone, it stays firmly in place without micro-rebounding.
- 14k and 18k Gold: Both yellow and white gold provide high tensile strength and rich color. Yellow gold offers slightly softer workability at the bench, while white gold alloys require firm, measured hammer strikes.
- Sterling Silver: Excellent for larger cabochons and artistic pieces due to its softness, though it requires slightly thicker walls (22 to 24 gauge) to prevent deformation over years of wear.
Step-by-Step Guide to Fabricating and Preparing a Bezel
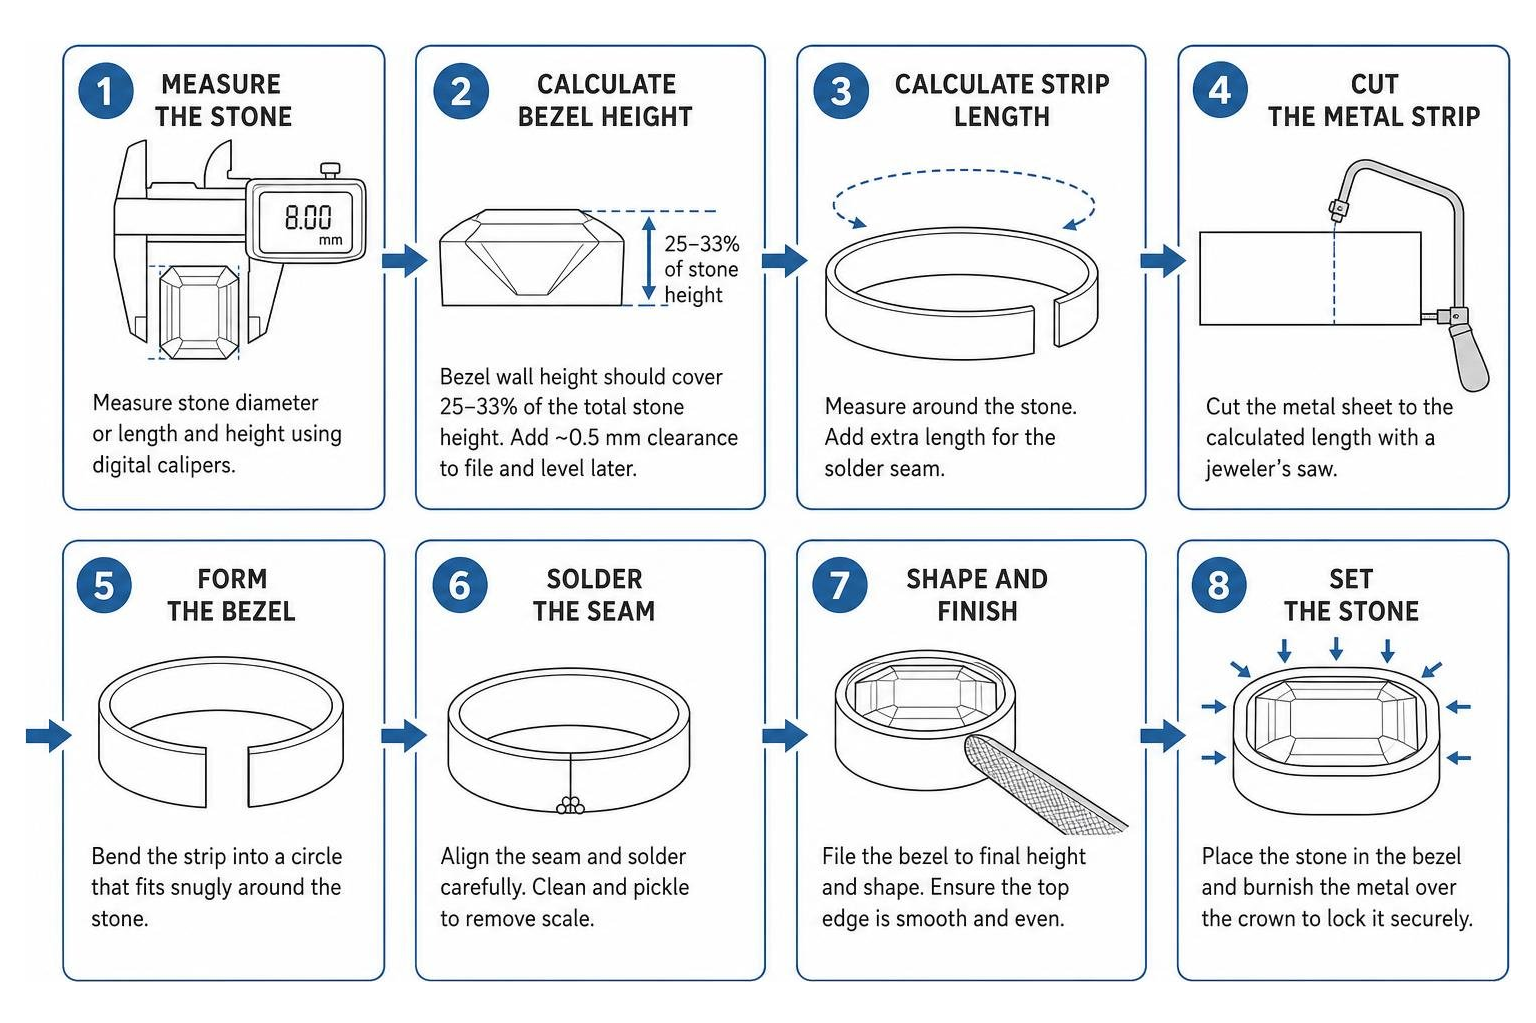
Fabricating a custom bezel from raw sheet metal requires exact measurement, careful heat management, and sharp hand tools. Jewelers inspect the diamond or colored gem with a 10x loupe prior to mounting, checking for pre-existing inclusions near the girdle that could react poorly to pressure. For a technical deep dive into round brilliants, consult creating a bezel for a round brilliant diamond.
Measuring Dimensions and Calculating Strip Length
Before picking up a jeweler's saw, measure your stone using digital calipers:
- Bezel Height: The wall height should cover between 25% and 33% of the total stone height. For a stone that is 4.0 mm tall, start with a bezel wall height of roughly 1.3 to 1.8 mm, leaving 0.5 mm of extra clearance to file and level later.
- Round Stone Length Formula: Calculate the required strip length by multiplying the stone diameter by an inflated pi factor of 3.5 (which accounts for the metal thickness wrapping around the exterior).
- Oval Stone Length Formula: Add the stone length and width together, divide by 2, and multiply the resulting average diameter by 3.5.
Essential Bench Tools for Bezel Making:
- Digital sliding calipers and 10x jeweler's loupe
- Miter-cutting vise and Swiss precision needle files
- Jeweler's saw frame with #2/0 and #4/0 blades
- Bezel mandrel and half-round forming pliers
- Hard and medium silver/gold solder pallions with paste flux
- Setting burrs (heart burrs and 70-degree bearing cutters)
- Bezel rocker, steel pusher, and polished agate burnisher
Forming, Soldering, and Cutting the Setting Seat
- Squaring the Seam: After sawing your metal strip, place the ends in a miter-cutting vise. File both ends to a flat 90-degree angle so they align without any light showing through the joint.
- Forming and Soldering: Shape the strip into a collar using half-round pliers. Apply paste flux and place a tiny pallion of hard solder on the interior seam. Heat with a torch until the solder flows cleanly through the joint, then quench and pickle.
- Trueing the Collar: Place the loop over a bezel mandrel and tap it gently with a rawhide or Delrin mallet until it matches the stone's profile.
- Soldering to the Backplate (if applicable): If making a closed-back cup, sweat-solder the bezel collar onto sheet metal using medium solder, then saw away the excess backplate.
- Pre-Beveling the Top Lip: File a 45-degree bevel along the outside top edge of the bezel rim. Reducing the mass at the very top edge makes moving the metal over the stone significantly easier.
- Cutting the Bearing Seat: Using a flex-shaft fitted with a setting burr matching the girdle angle, cut an internal ledge (bearing) into the bezel wall at an even depth. For wider advice on gemstone seat cutting, explore these gemstone setting tutorials.
Mastering the Stone Setting Process and Troubleshooting

With the seat cut and leveled, it is time to set the stone. A favorite bench trick: lay a thin strip of dental floss across the bezel cup before pressing the stone into place for a test fit. If the seat is too tight or crooked, you can pull the stone out instantly using the floss tails without having to drill through the back.
Proper Pushing and Hammering Techniques
Securing the stone requires balanced, opposite-point pressure to prevent the gem from tilting:
- The Clock Method: Secure your piece firmly in a ring clamp or thermoset plastic jig. Begin pushing the metal inward at 12 o'clock, then move directly opposite to 6 o'clock. Next, push at 3 o'clock, followed by 9 o'clock.
- Closing the Gaps: Once the cardinal points are anchored, work around the intermediate points (1:30, 4:30, 7:30, 10:30) using a rocking motion with a bezel rocker or curved steel pusher.
- Pneumatic Hammering: For heavy-walled platinum or 14k white gold rings, a pneumatic micro-hammer handpiece delivers controlled, rapid micro-taps. Keep the hammer tip polished to avoid deep dents in the metal.
- Bright-Cutting: Use a high-polish flat graver along the interior edge of the bezel wall next to the diamond facets to produce a clean, mirrored border.
How to Fix Common Bezel Setting Errors
Even master jewelers encounter fitting hurdles. Here is how to fix them:
- The Bezel Is Too Tight: If the stone will not sit flat on the seat, stretch the bezel collar slightly by sliding it down a tapered steel mandrel and tapping it with a steel planishing hammer. Alternatively, thin the interior wall slightly using a fine ball burr.
- The Bezel Is Too Loose: If you notice a visible gap between the stone and the wall before setting, cut through the solder seam with a saw blade, remove a fraction of a millimeter of metal, and resolder the joint.
- Tapered or Flared Walls: If the top opening of your bezel flared outward during shaping, grip the base with half-round pliers and gently compress the upper lip inward before cutting the bearing seat.
- Wavy, Uneven Top Rim: If the metal looks rippled after pushing, use a fine barrette needle file held parallel to the stone table to level the top rim, then smooth it using a high-grit abrasive wheel.
Finishing, Polishing, and Caring for Bezel Jewelry
The transition from a freshly pushed setting to a mirror-finished luxury piece requires careful abrasion management:
- Smoothing Tool Marks: Use medium and fine silicone abrasive wheels (pumice and silicone carbide) running at low flex-shaft RPMs to remove pusher marks on the metal rim. Keep abrasive wheels angled away from soft colored stones.
- Final Polish: Polish the metal using tripoli on a stitched muslin buff to remove micro-scratches, followed by rouge or dialux compounds for a high-luster shine.
- Cleaning and Protection: Bezel-set diamonds, sapphires, and rubies are safe for ultrasonic cleaners and steam cleaning. However, for porous or fracture-sensitive gems (such as opals, pearls, and emeralds), clean using only lukewarm water, mild dish soap, and a soft-bristled brush.
The versatility of this setting extends across fine jewelry, from everyday pendants like our bezel diamond necklace styles to comfortable, snag-free bezel diamond earrings.
Frequently Asked Questions About Bezel Settings
How high should a bezel wall be relative to the gemstone?
The finished bezel wall should cover approximately 25% to 33% of the stone's total height, extending just over the girdle and resting against the lower crown facets. Leaving the wall too high will cover too much of the gem's surface and cause the metal to wrinkle or bunch up when pushed.
Can any gemstone shape be set in a bezel?
Yes! While round, oval, and cushion shapes are the most common, angular fancy shapes like emerald cuts, marquise, and pears look striking in bezels. Angular stones simply require scoring the inside corners of the bezel strip with a triangular file before bending so the metal conforms to sharp points without tearing, as seen in complex pieces like our three stone bezel oval diamond engagement ring.
How do you safely remove a stone if the bezel is too tight?
If a gemstone gets wedged during a dry fit before final closing, do not pry it out with a metal tool, which can chip the facets. If you did not use the dental floss trick, press a ball of warm jeweler's sticky wax or dop wax onto the table facet, let it cool completely, and pull straight upward. A blast of compressed bench air directed along the side can also lift the stone out safely.
Conclusion
Whether you prefer the antique romance of a rub-over cabochon or the clean lines of a modern diamond solitaire, the bezel setting remains an enduring achievement in jewelry design. By encasing precious gems in a solid rim of precious metal, it delivers worry-free security, smooth everyday comfort, and timeless beauty.
At Masina Diamonds, our family has spent more than four decades handcrafting custom fine jewelry in Atlanta. If you are comparing mountings, explore our guide on comparing ring prong styles and bezel alternatives or design your dream setting using our interactive 3D Ring Builder.